Are you looking for the ultimate guide on How to build Alexa with a Raspberry Pi? Believe it or not, it’s entirely possible. This guide has a picture breakdown with steps on how to make an open source voice assistant.
Can I use the Raspberry Pi with Alexa?
Simply put, yes, you can use Raspbian OS to Control Alexa and it’s quite easy to set up. We’ll tackle that in this guide and hopefully, this will give you some insight into making your own fancy Smart AI.
Difficulty: 3/5
This is a pretty easy guide to follow, most of the others I saw involved a lot of configuring, using Node.js etc. But this can be done in the space of 30 minutes to an hour.
How to make Alexa at home
Preparing your Pi and Raspbian OS for Alexa
If you have already got Raspbian OS on your Raspberry Pi you can go ahead and skip this step.
Assuming you’re starting from scratch, we’ll work together on this! You’ll need the following before we can start (With recommendations):
- An Operating System such as Linux, macOS or Windows to load your SD Card
- An SD Card
- An SD Card Reader
- OS
- USB Microphone
- Temporary USB Keyboard & Mouse (We can set up remote connections down the line).
- A pair of 3.5mm earbuds / a speaker
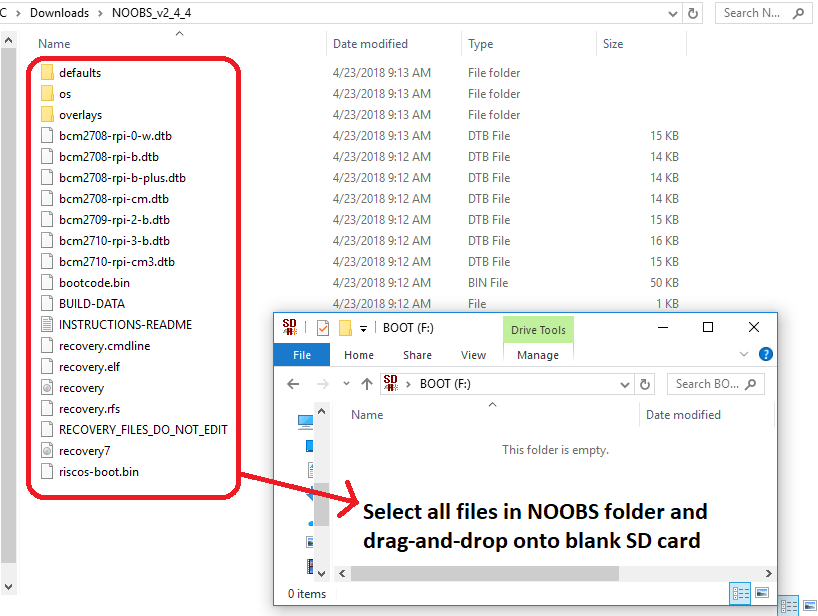
If you’re unfamiliar with a zip file, it basically compresses all files into one file (Like a folder). You should be able to simply drag everything out of it onto your SD Card and it will unzip it into that location.

Putting together your Alexa Pi
If you’re unsure on this, I will have a video guide on this soon. However, for now, these are the steps in question:
- Put in the MicroSD / SD card (Depending on your Pi Version
- Plug-in the USB Microphone and the 3.5mm audio jack Speaker or Earbuds
- Connect your keyboard and mouse (Temporarily)
- Connect the HDMI Port and Monitor (Temporarily)
- If you’re not using Wi-Fi, connect your Ethernet cable
The nitty-gritty set up
This is the fun part, once everything is plugged in you will need to plug in the power supply to your Micro USB Connecter in the Pi. You’ll notice a light on the Pi turn green and your monitor will show a boot loading screen followed by a Prompted selection of your Operating System.
If your Pi light is red after 10 seconds or you have an error on screen, try taking out the SD card and recopying the NOOBS Operating System to the SD card.
Once you have selected the correct Operating System, it can take around 15-25 minutes to fully install. You shouldn’t see any issues and you will be prompted with an “OK” button which will then take you to your new Linux Desktop.
If you’ve got an Ethernet cable, there’s no need to do this next part, otherwise, you’ll want to set up a 2.4GHz Wi-Fi connection on your Raspberry Pi. You can do this by selecting the connectivity icon in the top right of your operating system, this should be between the Audio and Bluetooth Icon.
Follow the steps as required to get your Wi-Fi connection setup. Simply click on the Web Browser (Icon is a globe) and test your internet connection.
Setting up your Amazon Developer Tools
This is where things get technical, so I’ll do as many pictures as I can. You’ll need an Amazon Developer toolkit which you can grab here. Make sure to sign in or create a new Amazon Developer Account.

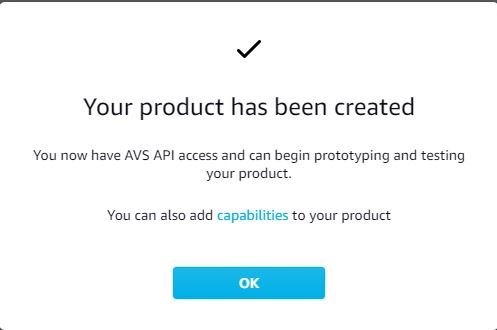
Once you’re in your dashboard, you’ll need to go to Alexa > Alexa Voice Service > Get Started > Products > Create Product.
The following product information is for your own reference, Feel free to copy the ones I have below:
Once you’re on Step 2 of 2, select “Create New Profile”, fill the fields with whatever you need (See my reference). You will be given some information such as secure keys, client IDs and Client Secrets. WRITE THESE DOWN ON A NOTEPAD.


For the Allowed Origins and Allowed Return URLs you will need a static IP for your Raspberry Pi. Read my guide on setting up a static IP here.
You will want to add the following to Allowed Origin (Replace the bold text with your Pi’s static IP):
- http://localhost:5050
- https://localhost:5050
- http://192.168.0.125:5050
- https://192.168.0.125:5050
Replace the IP address fields with your Pi static IP. Do the exact same for the “Allowed Return URLs”, except add /code at the end:
- http://localhost:5050/code
- https://localhost:5050/code
- http://192.168.0.125:5050/code
- https://192.168.0.125:5050/code

Now click on the product name you just created, this will bring you up with the product page (Should you have lost your Client ID and Client Secret).
Click on Capabilities and select the following:
- Named Timers and Reminders
- Display Cards with Text
Finish this by pressing UPDATE at the bottom.
Installing the Amazon tools onto your Pi
You’ll want to now go to your Raspberry Pi and Open Terminal. Do the following steps EXACTLY on your Pi
as I list them:
cd /opt
sudo apt-get install git
sudo git clone https://github.com/alexa-pi/AlexaPi.git
sudo nano ./AlexaPi/src/scripts/inc/os/debian.sh
This installs git, pulls the Alexa-Pi library and then goes into the configuration for the debian.sh file. Under the function install_os find the area which is called “vlc-nox” and change it to “vlc-bin”.

To save these changes, press CTRL + X and then press Enter. The last step here is to run the setup script, as such, type the following into the terminal:
sudo ./AlexaPi/src/scripts/setup.sh
This will ask you various queries, to confirm, you are using the following:
- debian
- raspberrypi
- 1
- y
Once that is done, you’ll need those details you had prior ready (Device Type ID, Client ID etc).
Device Type ID is your Product ID, for me, that is “RaspberryPi”.
Security Profile Description is also “RaspberryPi”.
Security Profile ID is available here. For me it is “amzn1.application.24dddxxxxxxxxxxxxxxxxxxxxxxxx”
Client ID is available on that same page at the top: “amzn1.application-oa2-client.d46acxxxxxxxxxxxxxxxxx”
Client Secret is below that: “a4dbf3bbbbf8e32f8c462f6d97xxxxxxxxxxxxxxxxxxxx”
We’re nearly done, but now we need to auth your device. Do this by going to your static IP address to auth it: http://locahost:5050
You’ll now see a prompt “Raspberry Pi would like Access to:….” Simply click Allow.
You’ve done it! All you need to do is reboot the Raspberry Pi and once it’s done, Alexa will start and say hello!
Enjoy your custom made Raspberry Pi Alexa, let me know if you have any other queries or have any issues in the comments. I’ll do my best to reply ASAP 🙂


