While the Wyze setup is cheap, it’s lacking some functionality which is frustrating, however, all those FLV files (Which you may have trouble viewing) can be merged into one piece of software. Continue reading to learn how to download and store Wyze camera videos.
How Can I watch Wyze Videos on my PC/Laptop?
You’ll find that most of your clips will be in a compressed file format called “FLV”, it’s a Flash Video that says a lot given flash has been ruled out in the last year or so.
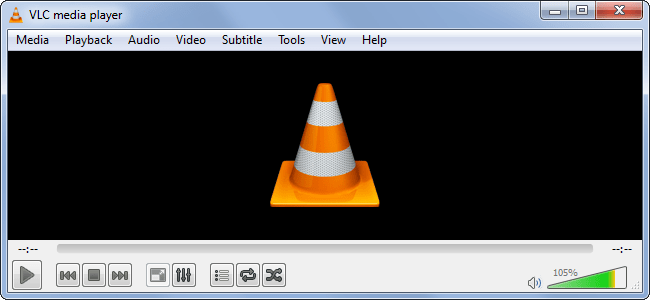
You will need to download a piece of software called VLC Player, don’t click any other links on this page other than This One to download it. (You never know when Google Ads will take you elsewhere!). I’ve used VLC a lot in the past, it’s a really good video player, to be honest!

How do I make my Wyze camera record longer?

You need to set your camera to only record when it spots motion otherwise you’ll see this fill up with 100’s of ridiculously short clips.
Don’t get too excited though, the camera still doesn’t record for long periods of time and still has lots of clips.
UPDATE: Wyze has now released an update called Complete Motion Capture (Or CMC for short). This is an addon service however and does cost additional money.
Wyze Complete Motion Capture (CMC)
Complete Motion Capture costs $1.49 a month per device/camera. It allows you to bypass the 12-second limit and record directly to the cloud.
CMC is pretty good as you won’t be recording to a local MicroSD (So, if that’s faulty you won’t have any issues).
Note: CMC doesn’t work for Wyze Cam v1 due to hardware limits!
You can actually get a 14 day free trial of the Complete Motion Capture for free without the required billing information required (This means no sneaky card payments!).
How to activate CMC:
- Prior to moving forward, make sure the Wyze App is up to date! You can get it directly via the following apps:
- Open the Wyze App.
- Select the Account Tab button on the bottom right.
- Select Wyze Service > Complete Motion Capture
- Activate your free trial and select the camera to assign it.
- Now activated, you can record videos for longer than 12 seconds directly to the cloud. These will be labelled as Complete Motion Events.
There are three kinds of recording available in the app:
Cloud motion/sound event: These are enabled in the camera settings (gear icon) > Event Recording. Also make sure that the Detection Zone under Detection Settings is not missing the area of motion. These are played back in the Events tab.
microSD card recording: This is enabled in Advanced Settings > Local Storage and can be set to continuous or event only recording. This is played back by pressing the View Playback button on the live stream. This is completely independent from #1.
Record button on live stream or playback: This saves to your phone’s camera roll or gallery, in real time, whatever is being played in the live stream or view playback. Note that it isn’t available when playing cloud events. It is viewed by tapping More and then the Album button, or by leaving the Wyze app and viewing the Wyze album in your phone’s photos or gallery app. This type of recording ceases when you leave the Wyze app.
DreadPirateRush – Forum Moderator
How to view Wyzecam footage on PC
To view your Wyzecam from your PC live, you usually need to use what is referred to as Real Time Streaming Protocol (RTSP). However, Wyze haven’t been very forthcoming with this technology.
One of the solutions many people who run a network of Wyze cameras is to use a piece of software called “Bluestacks” which is an Android Phone Emulator and download an APK to install the Wyze App directly onto there.
While this isn’t practical, it does work the best out of the box in terms of methods.
Alternatively, you can use this over a network but you do need to flash the Wyze Cameras to use custom firmware. This is however supported in the official Wyze documentation.
This will give you the most up to date version of the RTSP package and instructions on installing this. If you have any questions, please do let me know in the comments!
While this can be a lengthy process the first time you do it, it’s important to store your camera data in case there is a glitch or problem with your Wyze device such as error code 90 which could put your recording data at risk.
If you’re not sure how to do this further, I have a full video on it here:
Is there a Wyze app for PC?
Are you looking for a way to get your Wyze Camera viewable on your PC via a simple app? There’s actually a Google Chrome extension that is pretty fraudulent, it simply takes you to an article that shows you how to install Bluestacks on your PC and then emulate an Android app download.
If the Chrome extension has “Offered by: xxxxxx”, you can pretty much tell it’s a fake and it’ll just link you to a third party site.
Instead of this route of false direct apps, what you want to do is follow these steps to create an APK emulator:
- Download this Google Chrome Extension which allows you to load APK files (Android Apps) on Windows 10
- Upload the Wyze APK from here (I’ve always preferred APKMirror to its competitors)
- Select the right parameters (See video)
- Download Zip
- Press Start on your desktop and you’ll see a “Wyze” application.
How do I merge/combine all my Wyze Camera Recordings?
There’s no easy way of doing this sadly, it will require some manual labour so I would suggest doing this semi-regularly if you have a chance as it becomes a chore.
Using Windows 10 Video Maker:
Windows 10 comes with a native video editor which piggybacks off their “Photos” app. This application while not particularly powerful is a great way to merge your simple video clips together.
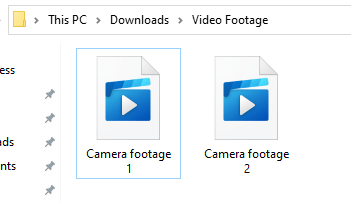
For this example. I have set myself up with two clips from my camera, following these steps will allow you to merge your camera footage with ease!

- Open the Video App by pressing
- Start and typing in “Video” until you see “Video Editor.
- This will open the standard Video app (Quite easy to understand).
- Select “New Video Project”
- Add your video clips to the project by selecting “+ Add” in the top left under Project Library.
- Simply Select all your video clips
- Now drag them all to the bottom bar (As per the video to your right)
- Select “Finish Video” in the top right.
I used to suggest using software like Wondershare Filmora9 for merging or combining your Wyze camera clips.
While Filmora9 is free, it does have its downfalls. It will ask you to buy a license, etc and the free version does have a watermark, once you export the video you create, the watermark will look like this video:
If you have a budget or can afford something else, I highly suggest actually using something more well known as Adobe Premiere Pro Creative Cloud, you can pay for this on a monthly basis which means it can be cancelled whenever.
The method for adding these videos is the same all around in the general scheme of things, you want to add the footage from your SD card into the project, from here sort by time/date.
You should then be able to select all the clips and drag them onto your timeline in the program of your choice. This SHOULD line them up one after another perfectly.
Once done, simply export the video in your preferred format, this would likely be an MP4.
It’s worth noting that this file format is heavier than an FLV and you will need to leave your PC alone for a while as it will render and export this for you.
In Summary
You pay for what you get and while there is a workaround to sorting the time limit for the video clips, it’s not super-efficient. Alternatively, you could get the Arlo System which costs a lot more but it does offer cloud storage where you can request footage to be downloaded.


